Skype for Business on Chromebooks
Skype for Business for Android extends the power of Skype to Chromebooks. Staff and faculty are able to make and receive voice & video phone calls over wireless, rich presence, instant messaging, conferencing, and calling features from a single, easy-to-use interface. The Skype for Business for Android is available for free through the Google Play app store.
(Select here for detailed instructions)
-
- Download Skype for Business from the Google Play store at https://play.google.com/store/apps/details?id=com.microsoft.office.lync15.
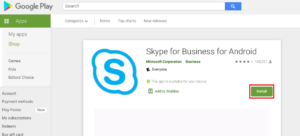
- Select the Install button to install the app.
- Select Install on the Choose a device screen.
- Select Only app install through play.google.com.
- Select the OK button to install.
- When complete, the display will show installed. Now it is time to configure Skype for Business.
- On the bottom menu of the Chromebook, select the circle in the lower left-hand corner of the screen. This will display a search bar and underneath will show the icon for Skype for Business. Select the Skype for Business icon.
- When Skype for Business loads, select the Phone icon. This will allow you to change from phone, tablet, or resizable. Select resizable.
- When prompted, select allow resizing. Then select the arrow to continue.
- Select the prompt, While Using the App, to allow Skype for Business to take pictures, and record video and audio.
- Select Allow, to grant Skype for Business access to your contacts, manage phone calls, and access photos and media. Then accept the Terms of use.
- Select the arrow to continue and enter your Trinity email address.
- Select the arrow to continue and enter your email password. Select the arrow again to continue and enter your office telephone number.
- Select the arrow to continue, and you will enter into the home page of Skype for Business.
- Download Skype for Business from the Google Play store at https://play.google.com/store/apps/details?id=com.microsoft.office.lync15.