How do I allow a single student to continue their existing quiz attempt?
Moodle allows for individual user overrides and group overrides for quizzes. These overrides can be used to allow a different number of quiz attempts, as well as a different open/close date/time windows and a different time limit.
However, if you want the student’s second attempt to be a continuation of the first, you will need to change some overall Quiz Settings before you can accurately enter the override. This could be necessary, for instance, to provide the student 15 more minutes to finish the midterm, because the student had lost internet connection at the very end of the 100-question test.
So the goal is only to basically to re-open the attempts so the student can finish. However, there isn’t re-open an quiz attempt in Moodle. BUT you can have the system build on that first attempt for a single student…and it’s basically the same.
To an add a second attempt building on the previous for a single user or a group of users by utilizing an override, follow these steps.
Note: you can click on any image to view a larger version of the image.
- Log on to Moodle and click on your course.
- Click on your quiz on the course homepage.
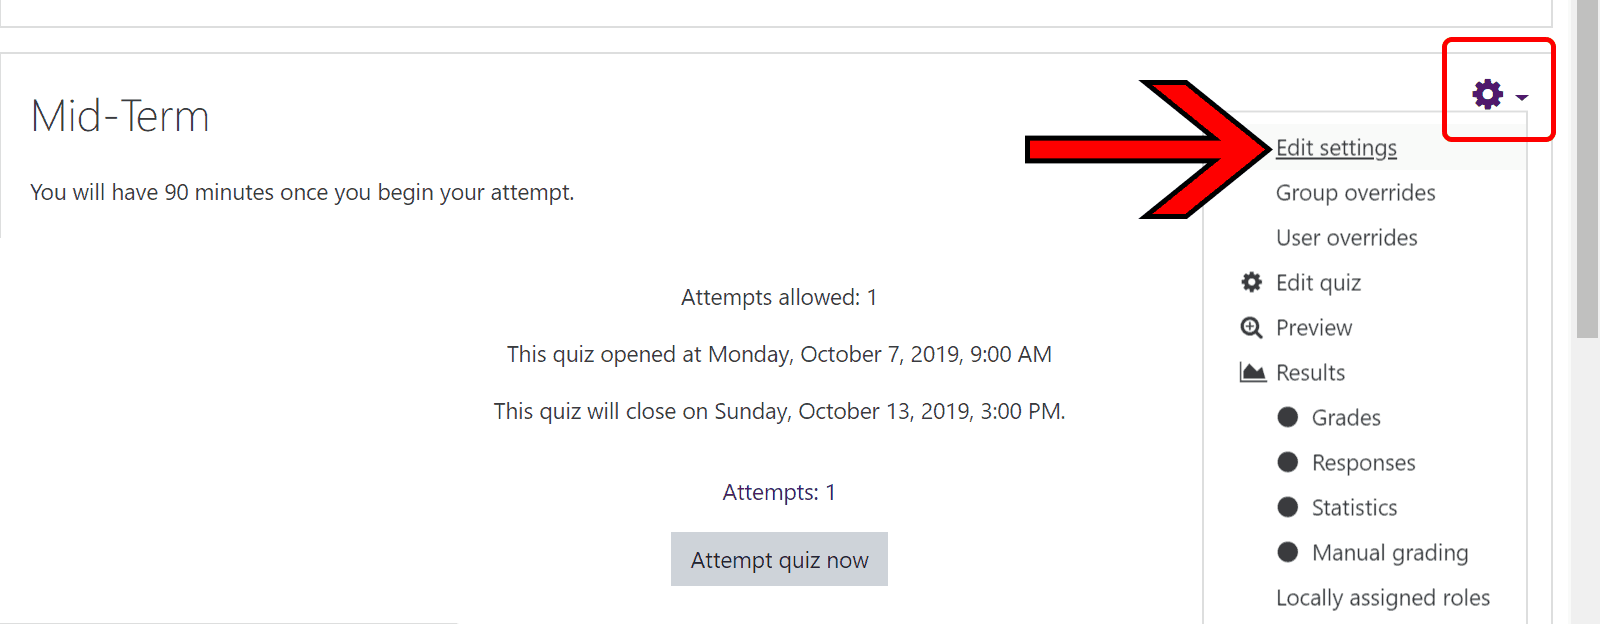
- From the quiz landing page, look in the upper right corner of the center section of the quiz page for the black ‘edit’ gear wheel. Click on the gear wheel.
- From the drop-down menu that appears, click the ‘Edit settings’ option.
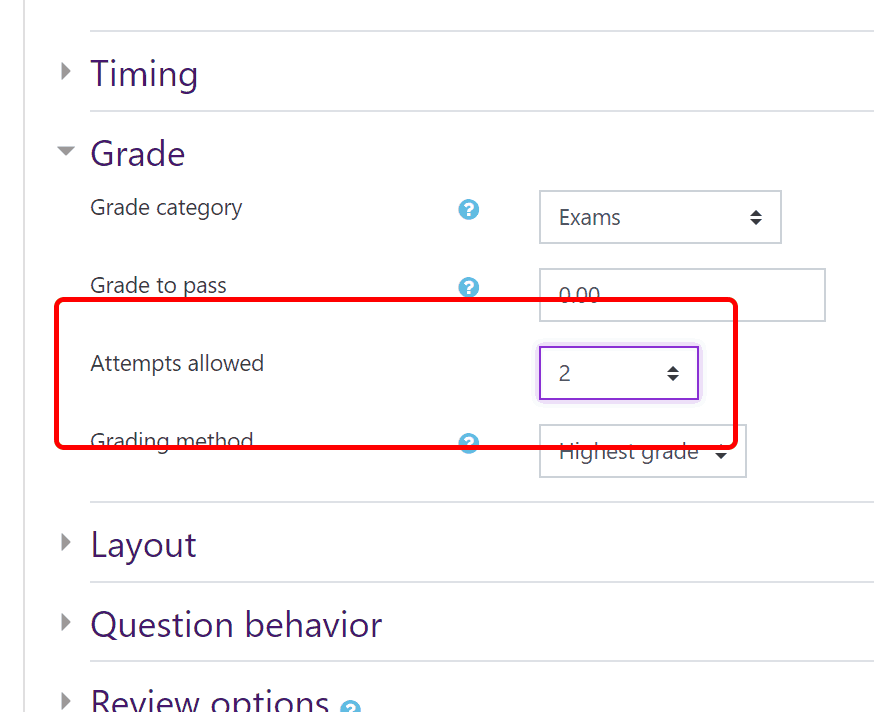
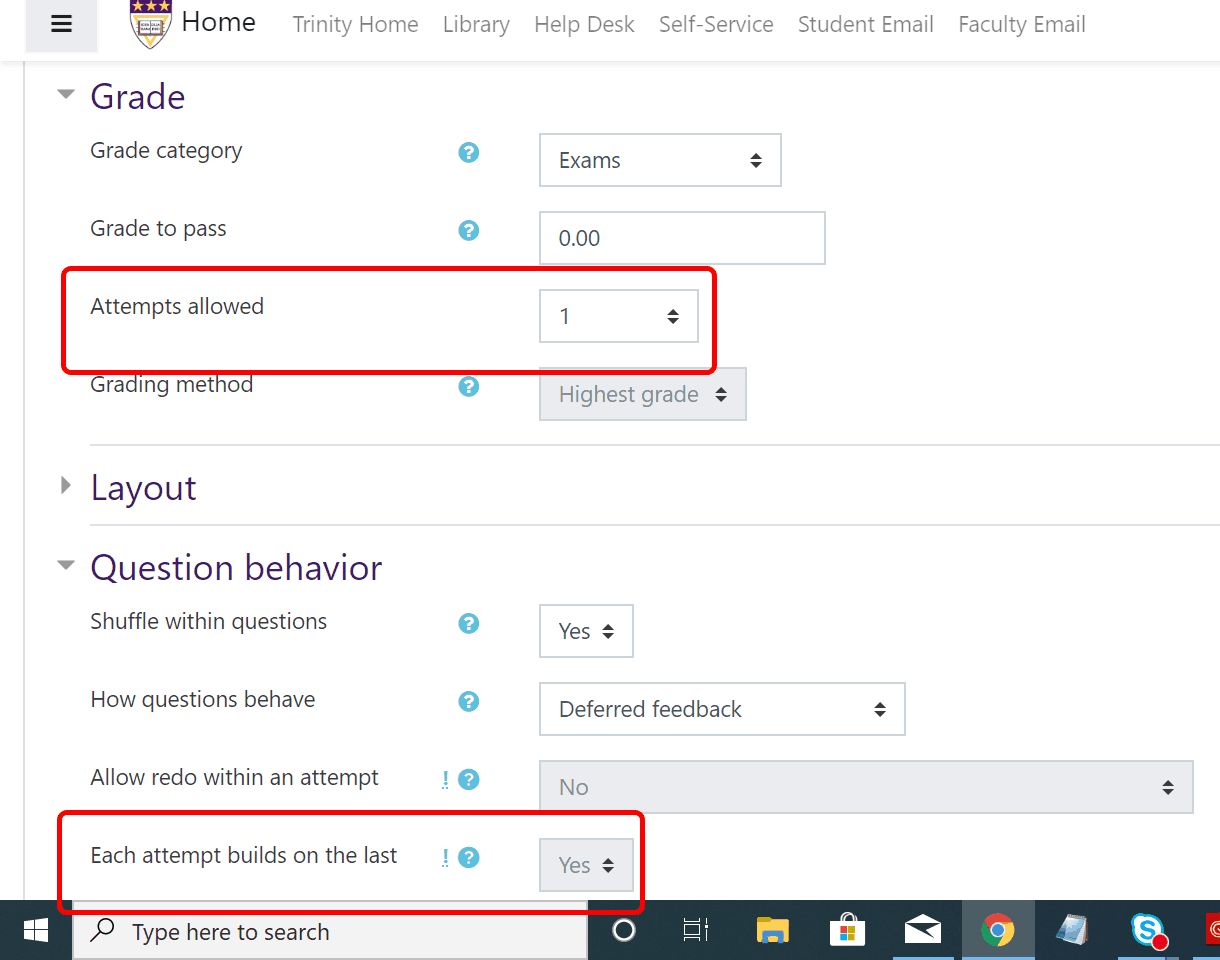
- Scroll down and click on the “Grade” section. Change the “Attempts allowed” from ‘1’ to ‘2’.
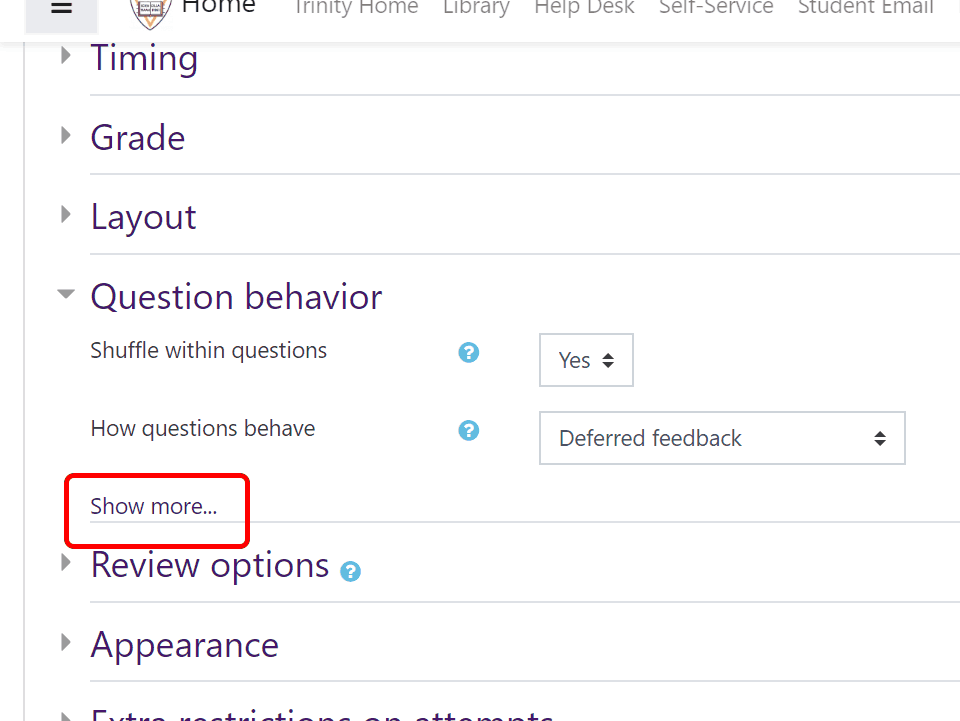
- Then, scroll down and expand the “Question behavior” section. Click on the “Show more…” option.
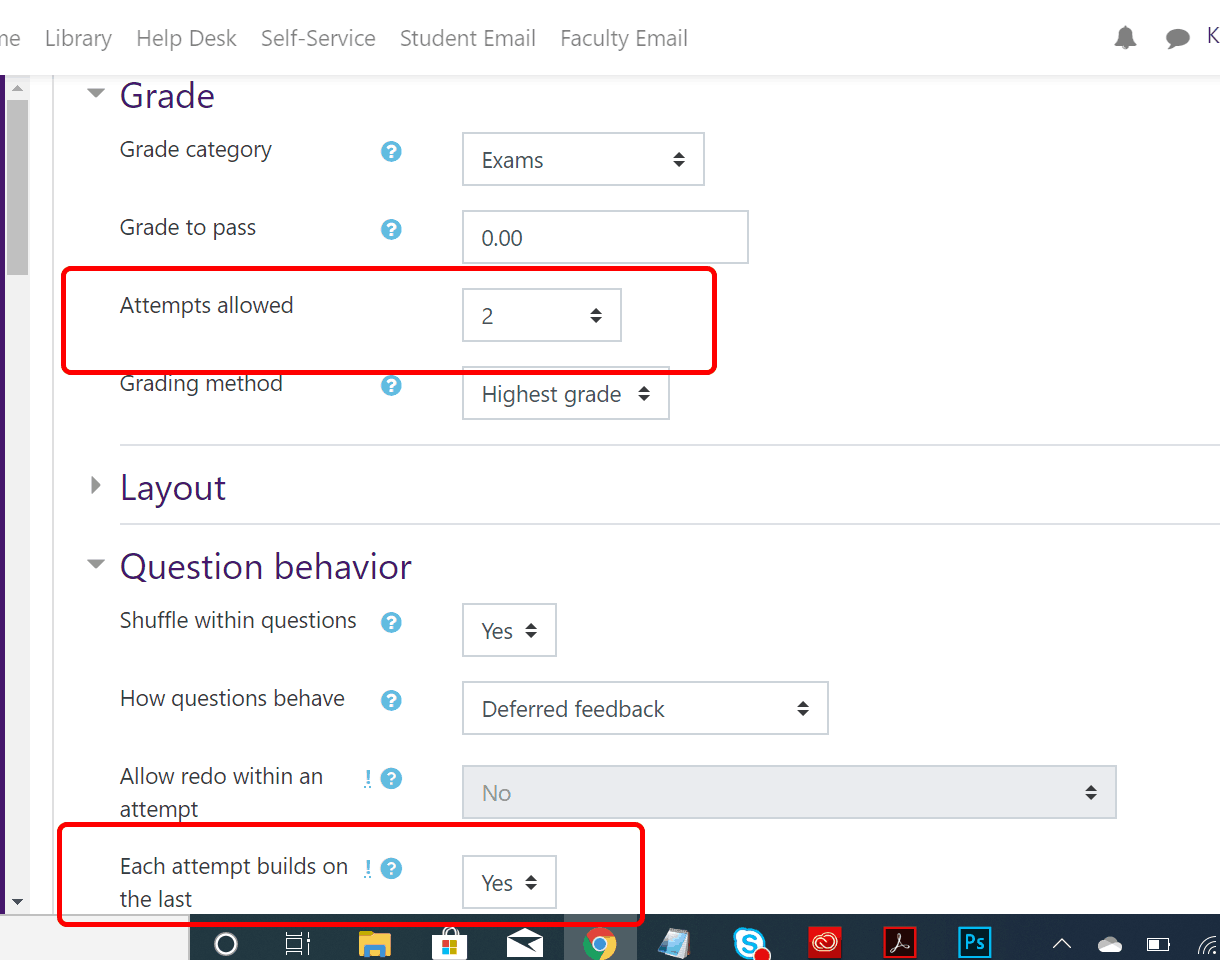
- Then change the “Each attempt builds on the last” setting to ‘Yes.’ So it looks like this:
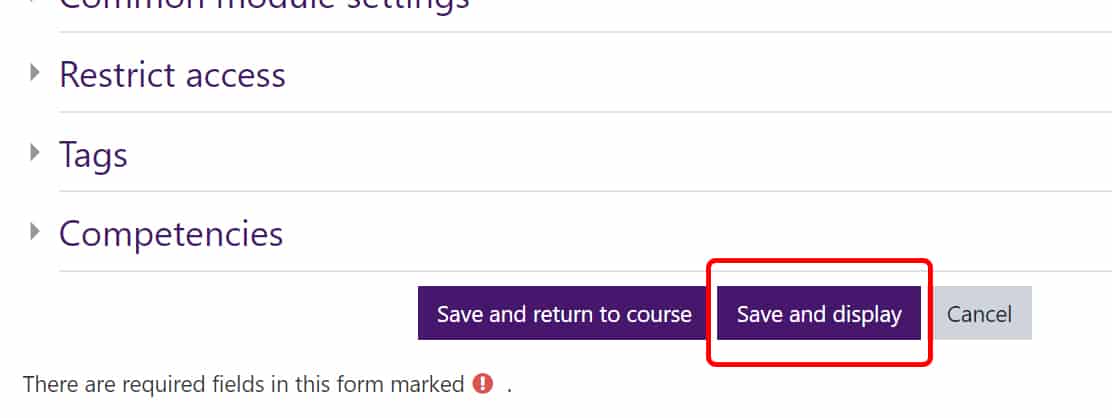
- Now we have to save the settings for the whole exam. Scroll down and click the ‘Save and display’ button.
- Now you are back on the quiz homepage. Click on the gearwheel again and select the ‘User overrides’ option.
- On the next screen, click on the “Add user override” button.
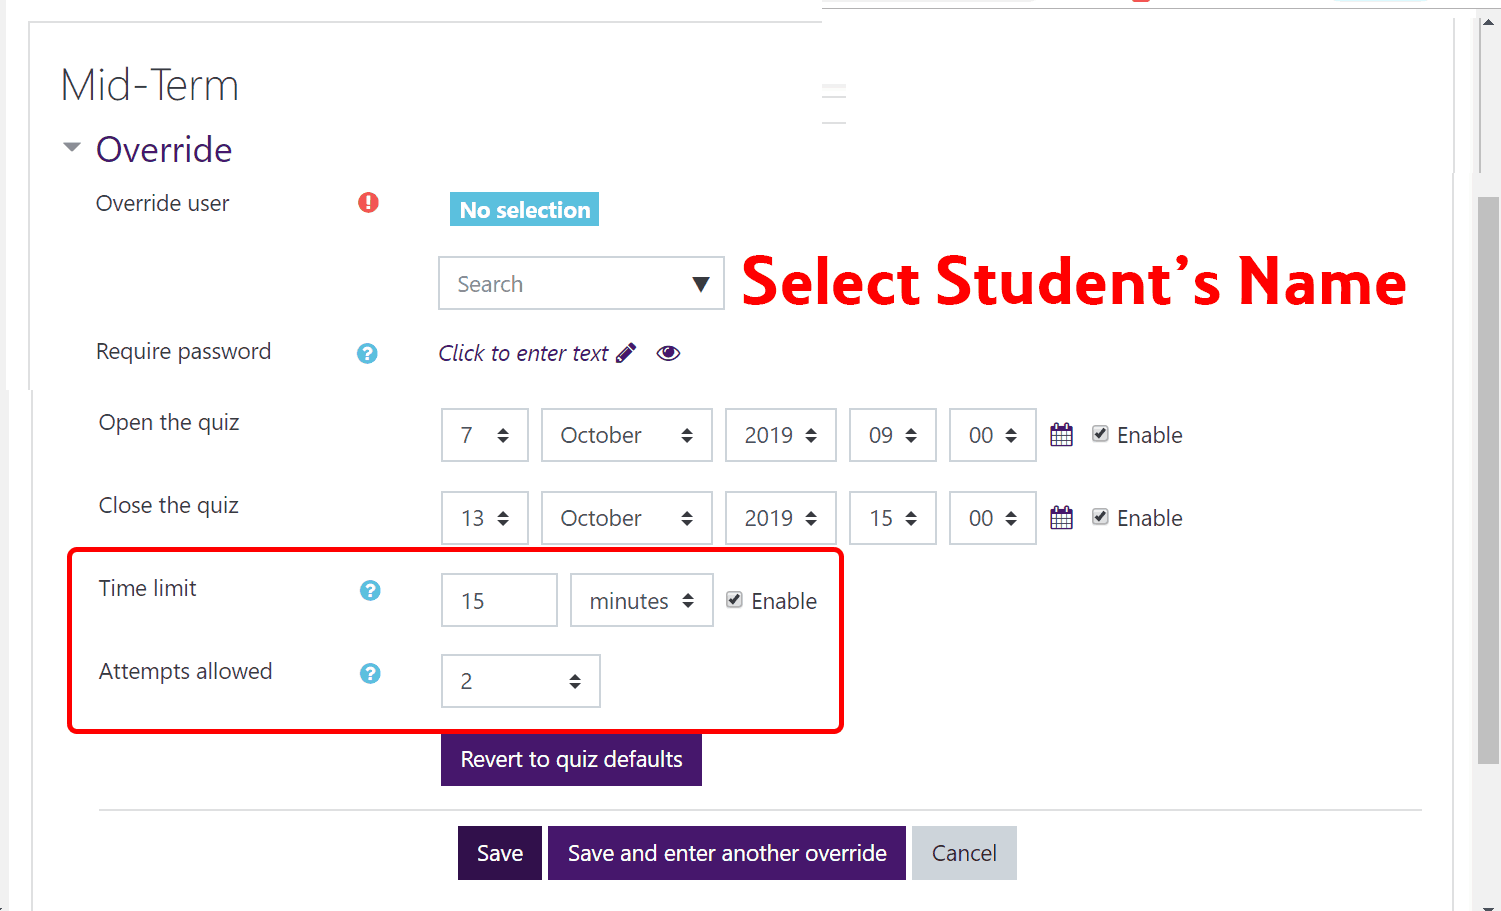
- Then on the “Edit override” page, select the student’s name for the “Override user” section. (You can search or select from the from the “Search” drop-down.)
- You can adjust the following settings:
- Require password – Require the individual with the override to enter a password to complete the quiz.
- Open the quiz & Close the quiz – Adjust the open and close date/time windows. Don’t forget to check to “Enable” button so that you can adjust these settings.
- Time limit – Change the time limit. Don’t forget to check to “Enable” button so that you can adjust this setting.
- Attempts allowed – Allow more (or less) attempts than the quiz defaults.Scroll down and adjust the necessary settings.
- For a second attempt, you would change the “Attempts allowed” to “2.” If you are only allowing a short amount of time to complete the already begun exam, then you would also need to adjust the “Time limit” to the a shorter amount required to complete the exam.
- Don’t forget to double-check that the “Close the quiz” date/time has not already passed or you will need to adjust this setting as well. Note: if you do not alter one or more of these settings, the settings will remain at the original quiz defaults. For example, if the quiz is closed to all students because the quiz’s original close date/time has passed and you do not adjust the override’s close date/time, even if you give a specific student a second attempt, they will not be able to access the quiz.
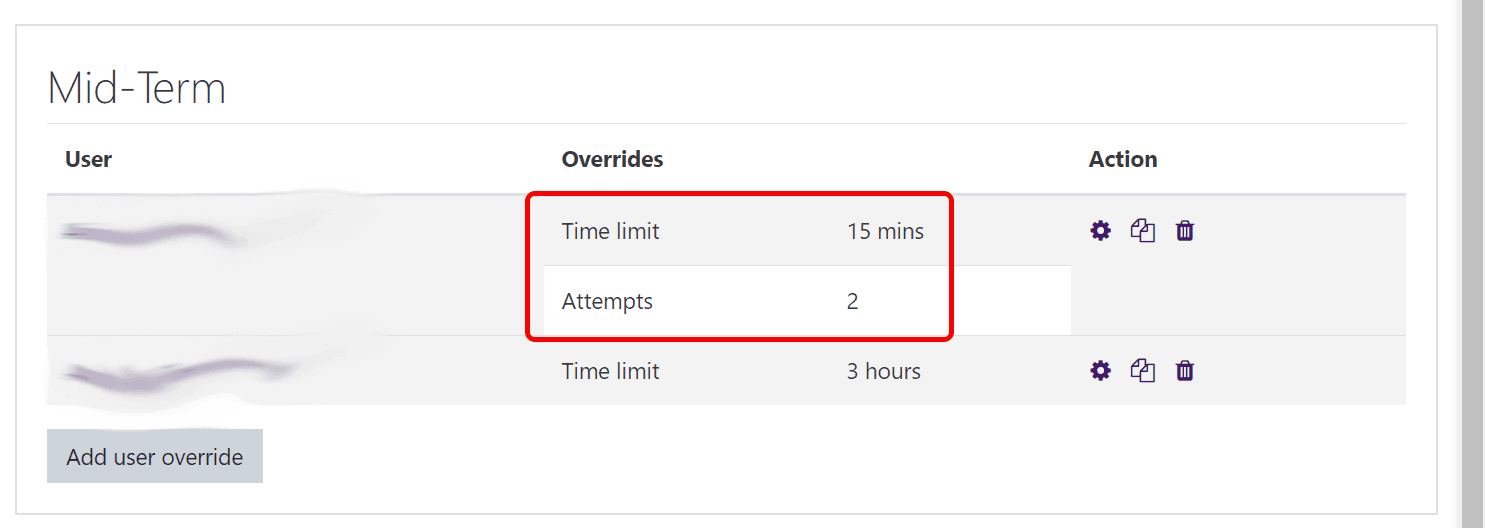
- When you are done, click either the “Save” button. You will be returned to the overrides page and you can review the override to make sure it matches what you intended.
- Immediately return to the main quiz page. Click on the gear wheel in the upper right. From the drop-down menu that appears, click the ‘Edit settings’ option.
- Scroll down and expand the “Grade” section. Change the attempts back to ‘1.’
- You’ll notice that the ‘…builds on…’ setting is grayed out, but switched to ‘Yes.’ That is how you want it.
- Scroll down to the bottom of the page and click the ‘Save and display’ button.