How do I take attendance in groups?
There are four steps for tracking attendance in groups.
Step 1: Set up Groups
You must set-up your groups before you can set up your group attendance sessions. Faculty FAQ: How do I create groups in my course?
Step 2: Add a new Attendance Activity in Group Mode
A group attendance activity is separate from your standard attendance activity, displayed by default. Follow these steps to create the Group Attendance activity.
- On the main page of your course in Moodle, click the ‘Turn editing on’ button in the upper right of the main page by the large course name.
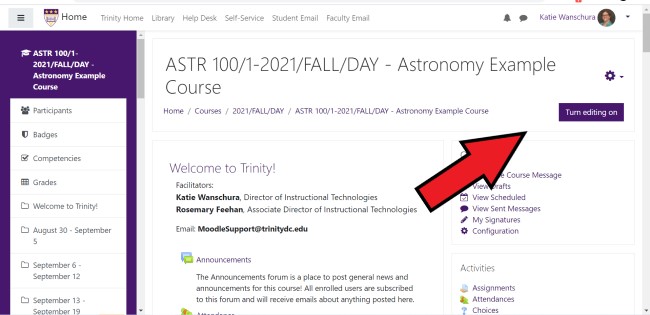
- Scroll down to the bottom of the top section and click on the ‘+Add an activity or resource’ option.
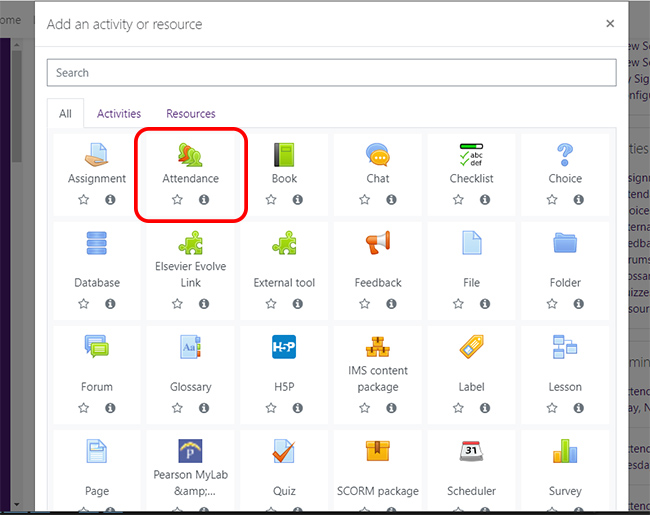
- Select the ‘Attendance’ option.
- Complete the settings for the Attendance activity.
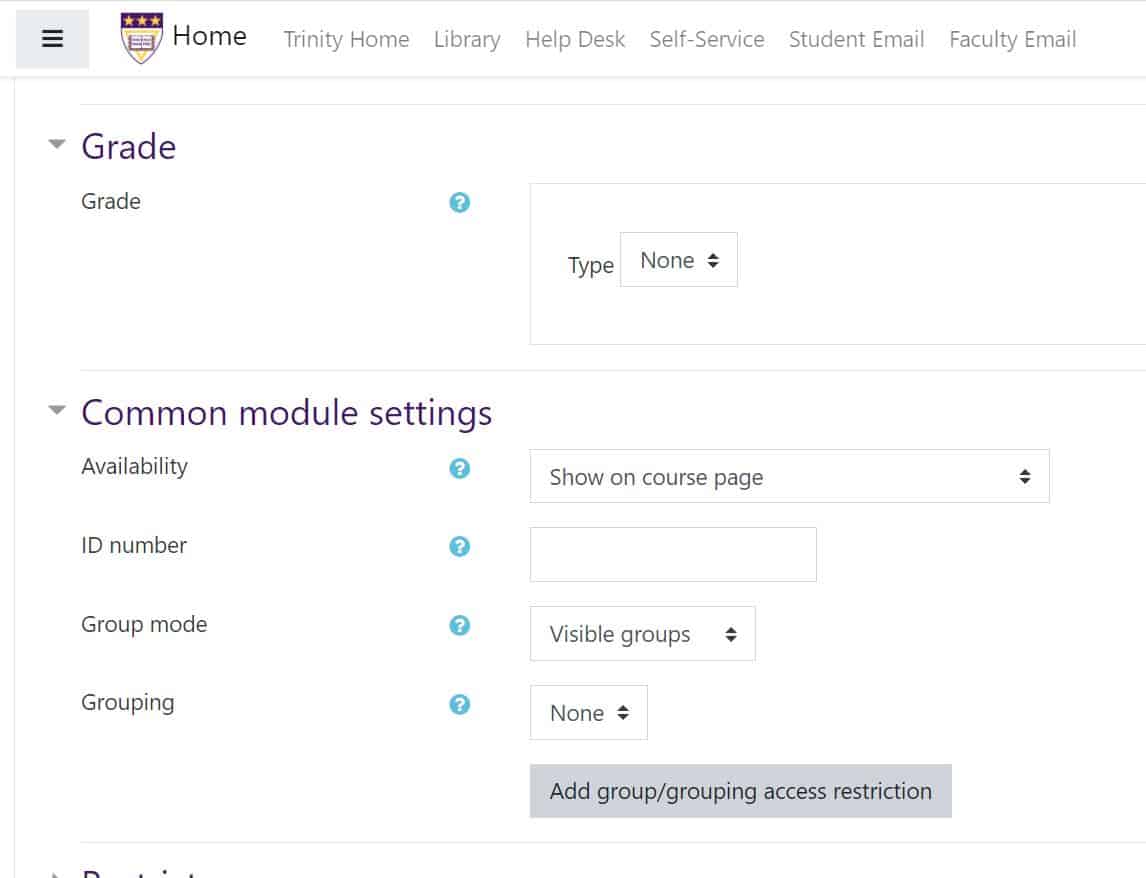
- Under the ‘Grade’ section, change the grade type to ‘None,’ unless you wish the system to automatically calculate a grade for attendance. (The system will let you change an ungraded Attendance activity to graded, but you cannot do vice versa.)
- Under the ‘Common module settings’ section, change the ‘Group mode’ to ‘Visible groups.’
- Under the ‘Common module settings’ section, select the appropriate ‘Grouping,’ if you have created a set of groups.
- Scroll down and click the ‘Save and display’ button.
Step 3: Add Group Sessions to the new Attendance Activity
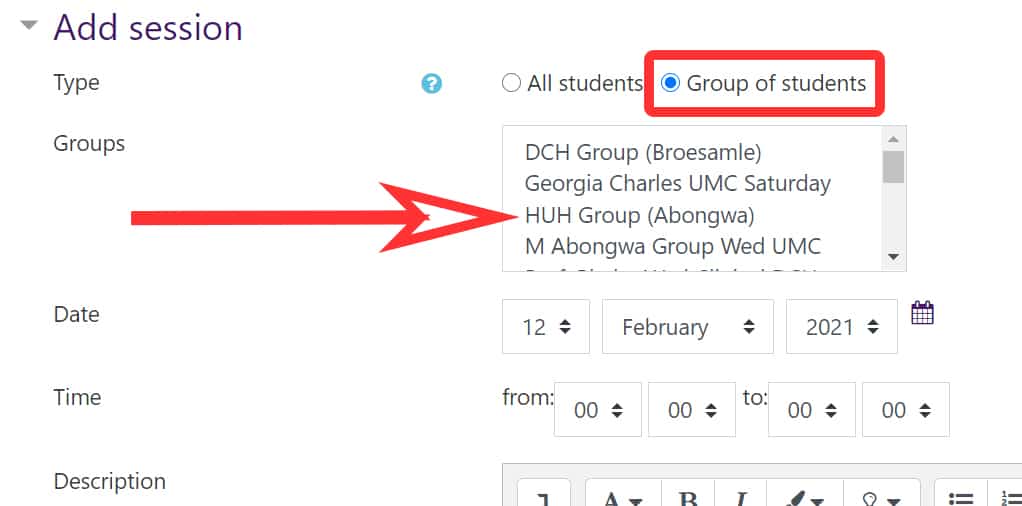
- From within the Attendance activity, click on the second tab, titled, “Add session.”
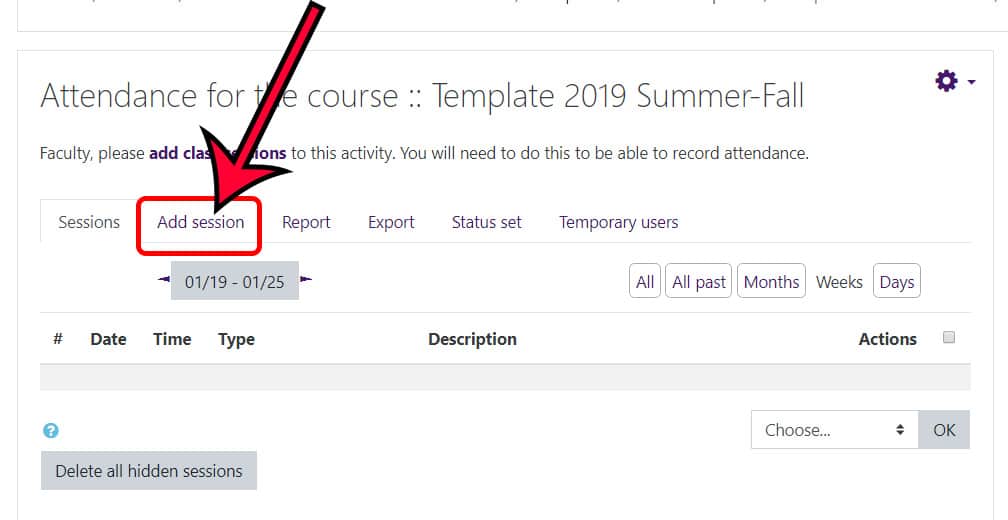
- On the “Add session” page, you now have the option to set up a session up for all students or to select a specific group. Click on the radio button next to “Group of students” and then select the group(s) to which this attendance session will apply.
- The rest follow as a normal Attendance class session. Under the “Add session” heading:
- Enter the first date of the week for which this session will track attendance, unless you know the date your student will meet with you.
- Leave the “Time” field as is, unless you know the time your student will meet with you.
- Complete the “Description” field with information about this session, such as “WEEK 1: 8/21 – 8/27” or “Module 1 Attendance”
- Leave everything else as is.
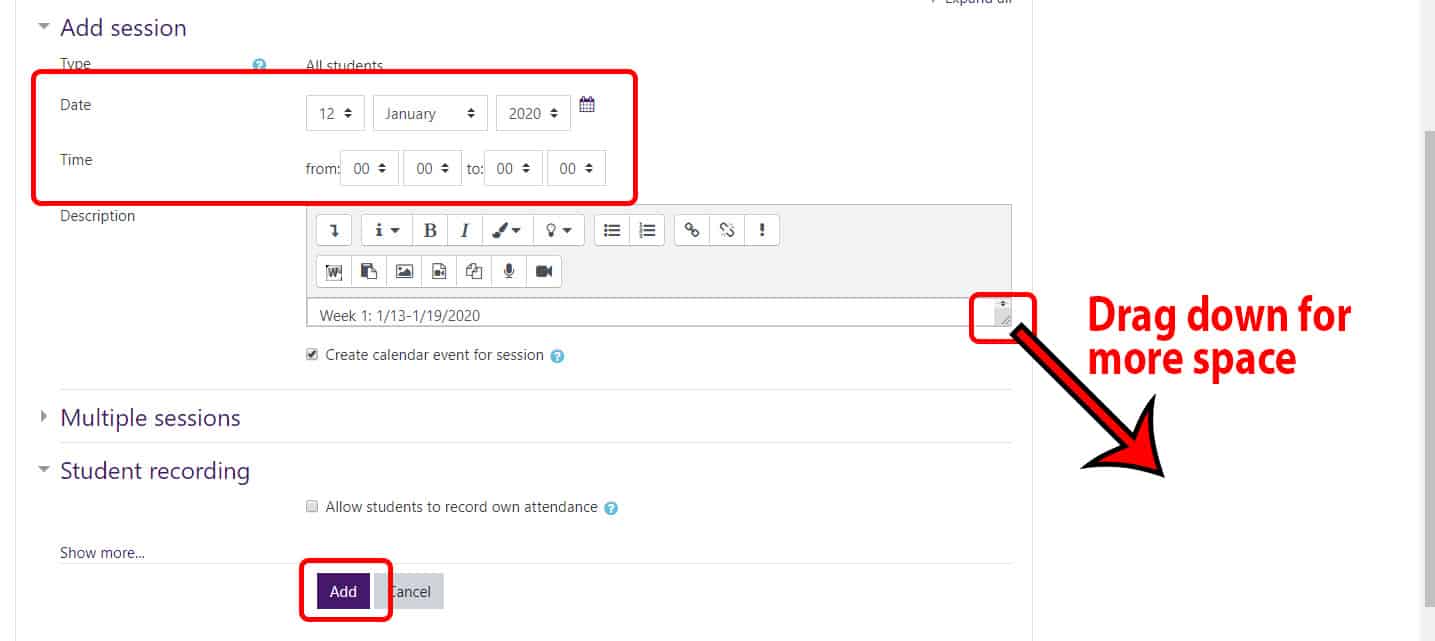
- Scroll down and click the “Add” button to create your class session.
- The system will create the session and return you back to the main attendance activity page.
Step 4: Record Attendance
Please note: you cannot submit attendance early; you must wait until the start date and time for class session has passed. If you set this week’s attendance to be taken Thursday at 6:30PM, even if it’s at 6:29 PM on Thursday, you must wait. Moodle does not officially report the attendance of students whose instructors can see the future, no matter how few seconds early it may! If you do submit early, you will need to add a new class session, record the attendance AFTER the start date/time, and delete the older, incorrect session.
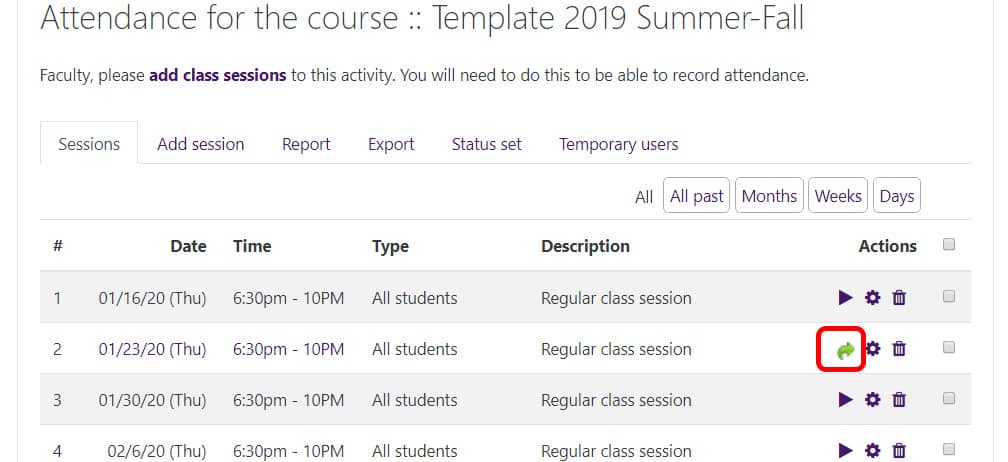
- Click on the Group Attendance activity on the main page of your course.
- Click on the arrow in the “Actions” column to take or update the attendance. The arrow will be a black ‘play’ triangle arrowhead, if you have not previously entered any attendance, and it will be a green curved arrow, if you need to update attendance.
- Then on the session page, mark the students either ‘P’ for attending and ‘A’ for not attending the course.
- When you are done indicating the attendance, click the “Save attendance” button.
- Attendance syncs between Moodle and the Enrollment Services database overnight.